Email provider setup
Choose how your emails are sent: the built-in Platform Default, your own Postmark account or your own mail server. Add your mailing address first, because permission emails need it.
Add your mailing address first
You cannot send permission requests without a physical mailing address. It appears in the footer of those emails. You also need a Support Email on General.
Click Settings at the bottom of the sidebar, then Email. You need an Owner or Admin role.
Under Physical Mailing Address, fill in your company name and address.
Click Save Address.
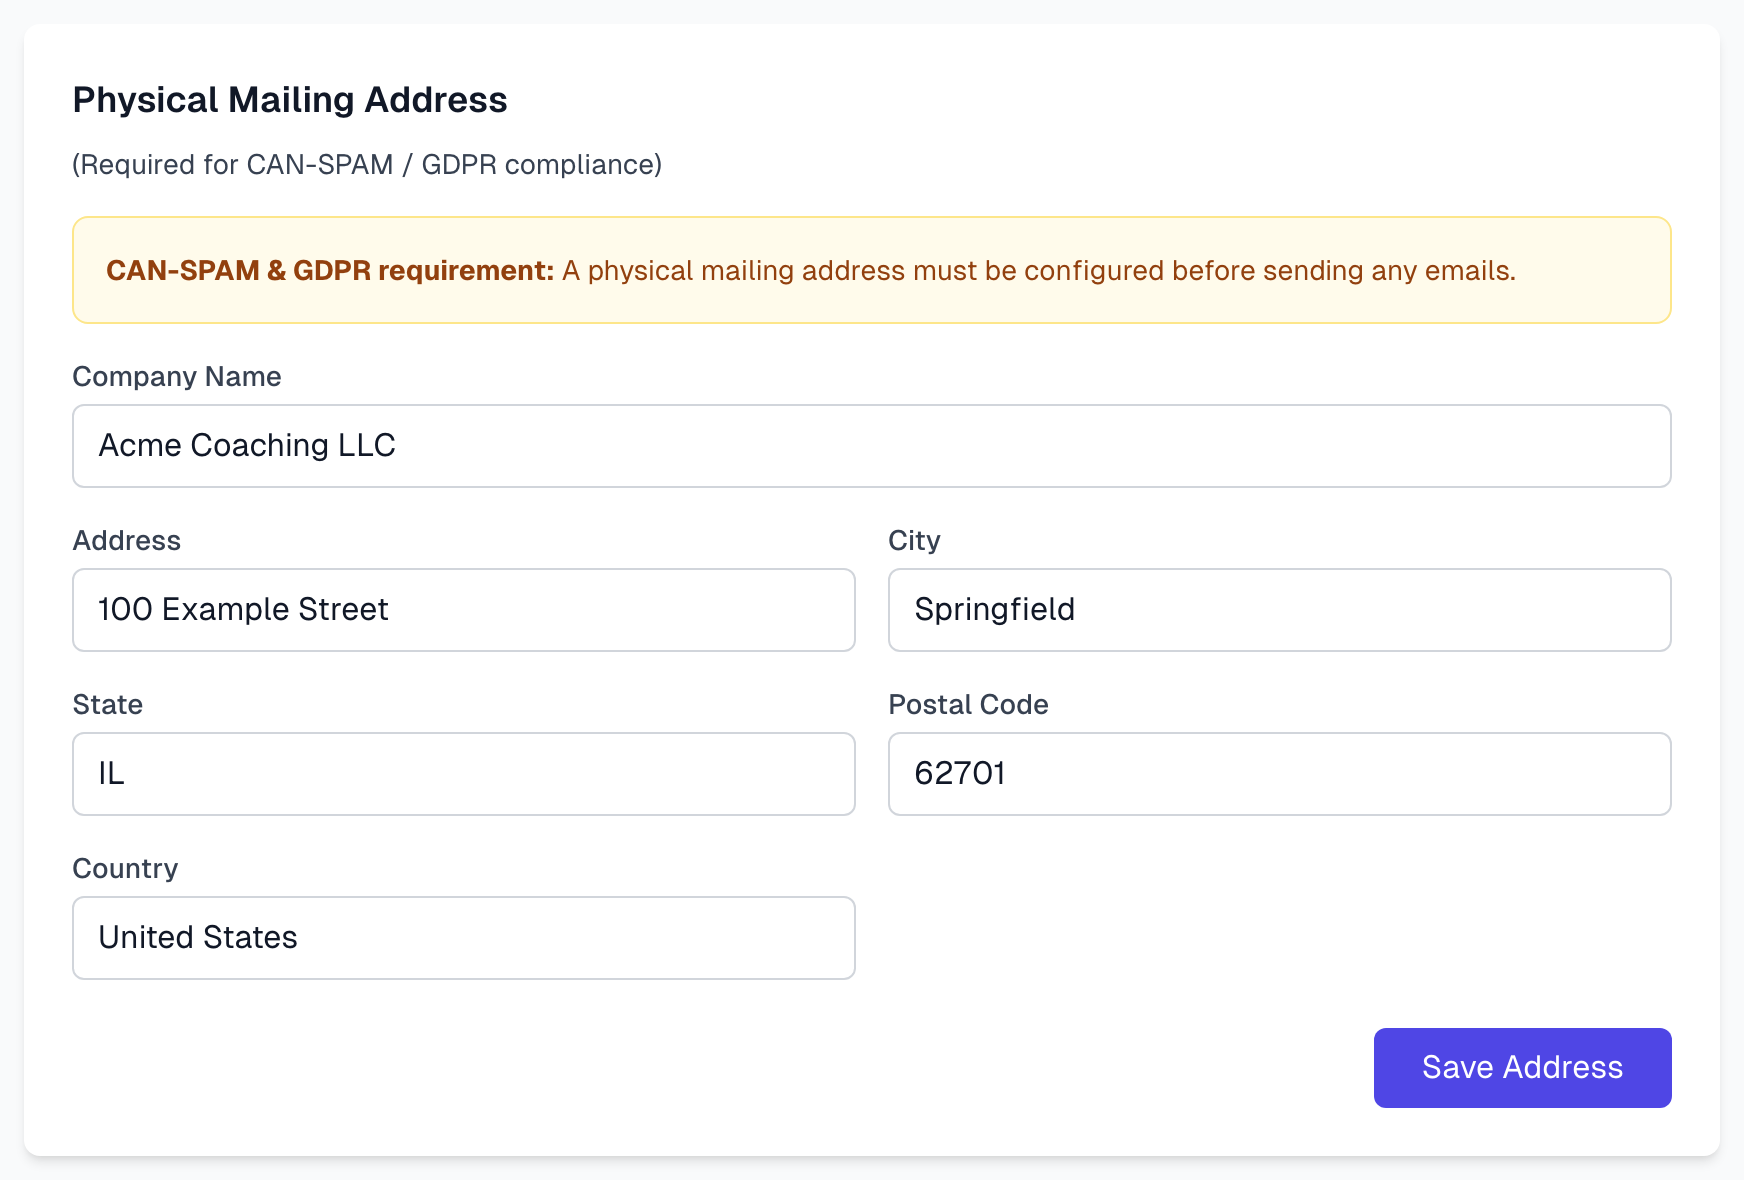
Choose a provider
Provider | What you need | Emails come from | Bounce tracking |
|---|---|---|---|
Platform Default | Nothing | magic-testimonials.com | Yes |
Postmark | A Postmark account and its Server API Token | Your own address | Yes |
Custom SMTP | Your mail server's details | Your own address | No |
Just starting? Platform Default works with no setup. Authors are more likely to trust an email from your own domain, so move to Postmark or Custom SMTP when you send to real customers. With Custom SMTP, a bounced address is not flagged, and Resend will still send to it. See Bounce handling.
Connect Postmark
Under Configure Email Provider, choose Postmark. If a provider is already set up, click Reconfigure first.
Enter your From Email and From Name. From address helps you choose them.
Paste your Server API Token into Postmark API Key. You find it in your Postmark account under Servers, API Tokens.
Click Test Connection. A green Connection successful means the key works.
Click Save Configuration.
Connect your own mail server
Under Configure Email Provider, choose Custom SMTP. If a provider is already set up, click Reconfigure first.
Enter your From Email and From Name.
Enter the SMTP Host and choose the Port. Your mail provider gives you these. Avoid port 25, which is unencrypted.
Enter the Username and Password. For Gmail, use an App Password, not your normal password.
Click Test Connection.
Click Save Configuration.
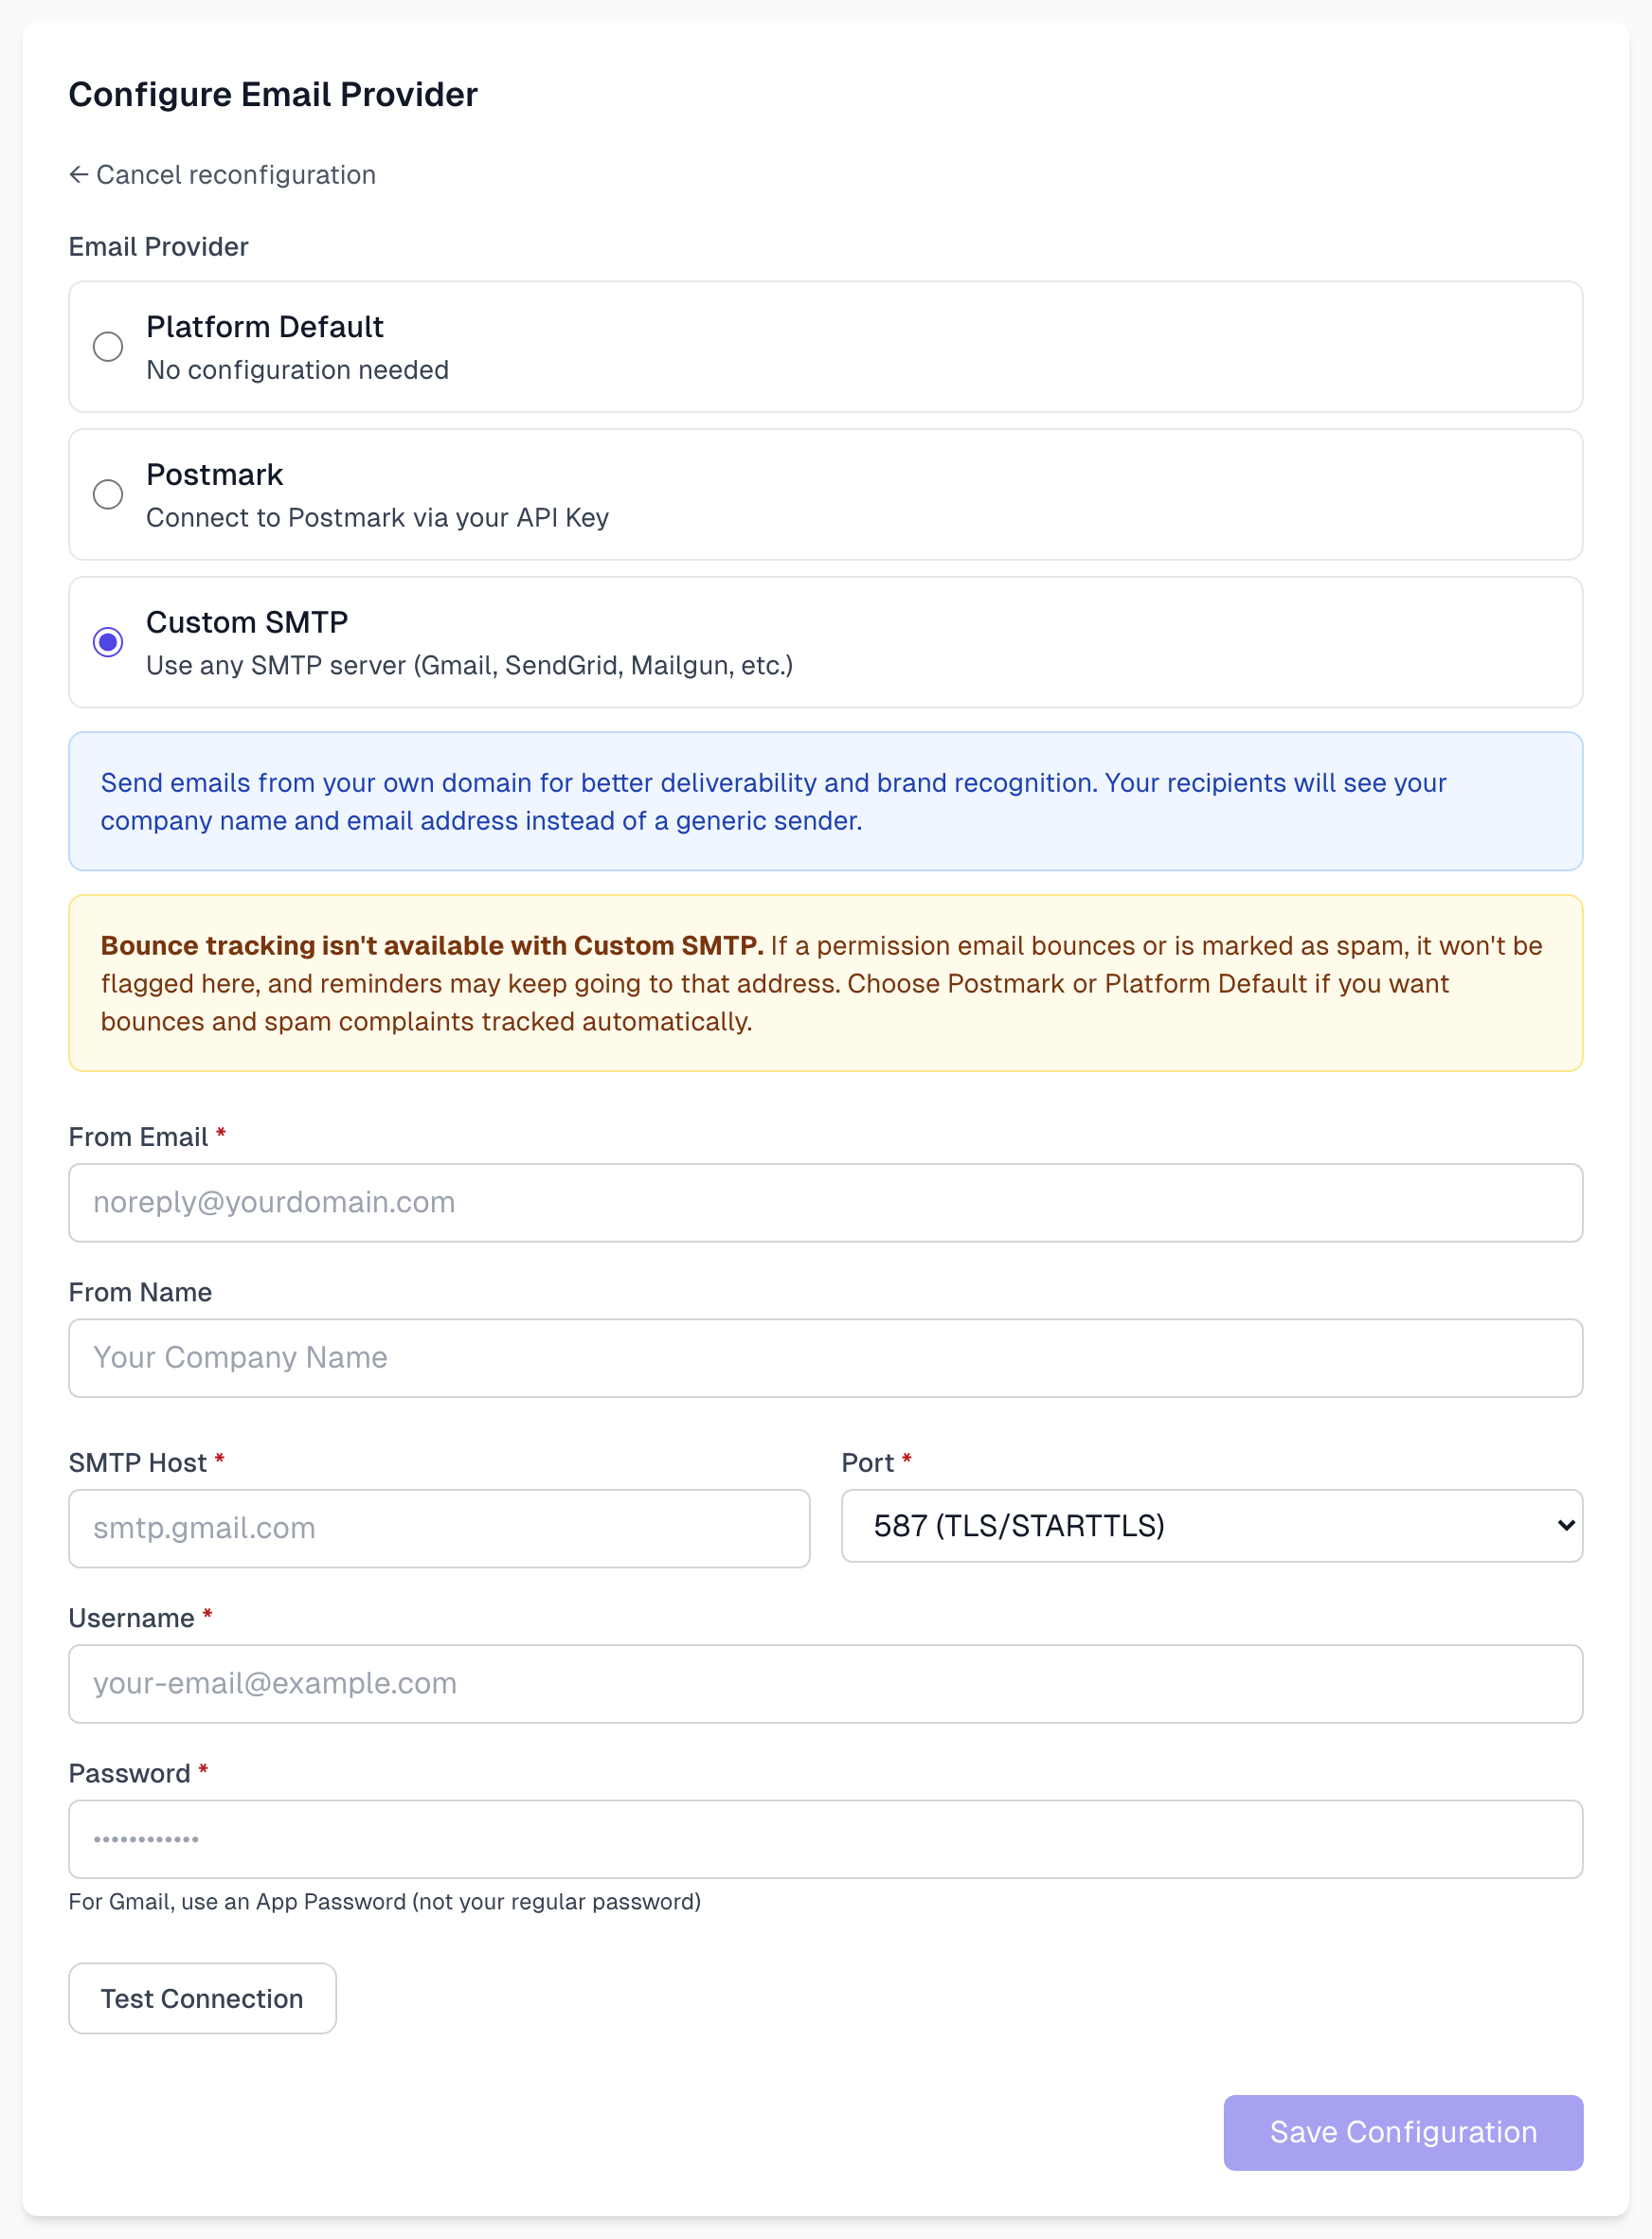
Save Configuration also tests the connection, and it saves nothing if that test fails. Afterwards, send yourself a test. See Test send.
Change your provider later
Click Reconfigure.
Choose a provider and fill in the form again. Your saved keys and passwords are never shown, so you need to enter them again.
Click Save Configuration.
The new provider replaces the old one for every email from then on. Click Cancel reconfiguration to keep what you have.
If something goes wrong
Save Configuration is greyed out
Postmark and Custom SMTP need a From Email. Enter one and the button becomes active.
Authentication failed. Check username and password.
Your SMTP login was refused. With Gmail, this usually means you used your normal password. Turn on two-step verification in your Google account and create an App Password.
Could not connect to SMTP server
Check the host and port. Connection timed out and Could not resolve hostname point to the same two fields.
Postmark connection failed
Check that you pasted the Server API Token from Servers, API Tokens.
It saved, but permission requests do not send
Check that your mailing address and Support Email are both saved. Then see Email issues.
Last updated