Review, edit and approve testimonials
Check what AI read from each capture, fix anything that is wrong, ask the author for permission, and approve the testimonial so it can appear in your widgets.
Open a testimonial
Click Inbox in the sidebar.
Click a row to open it.
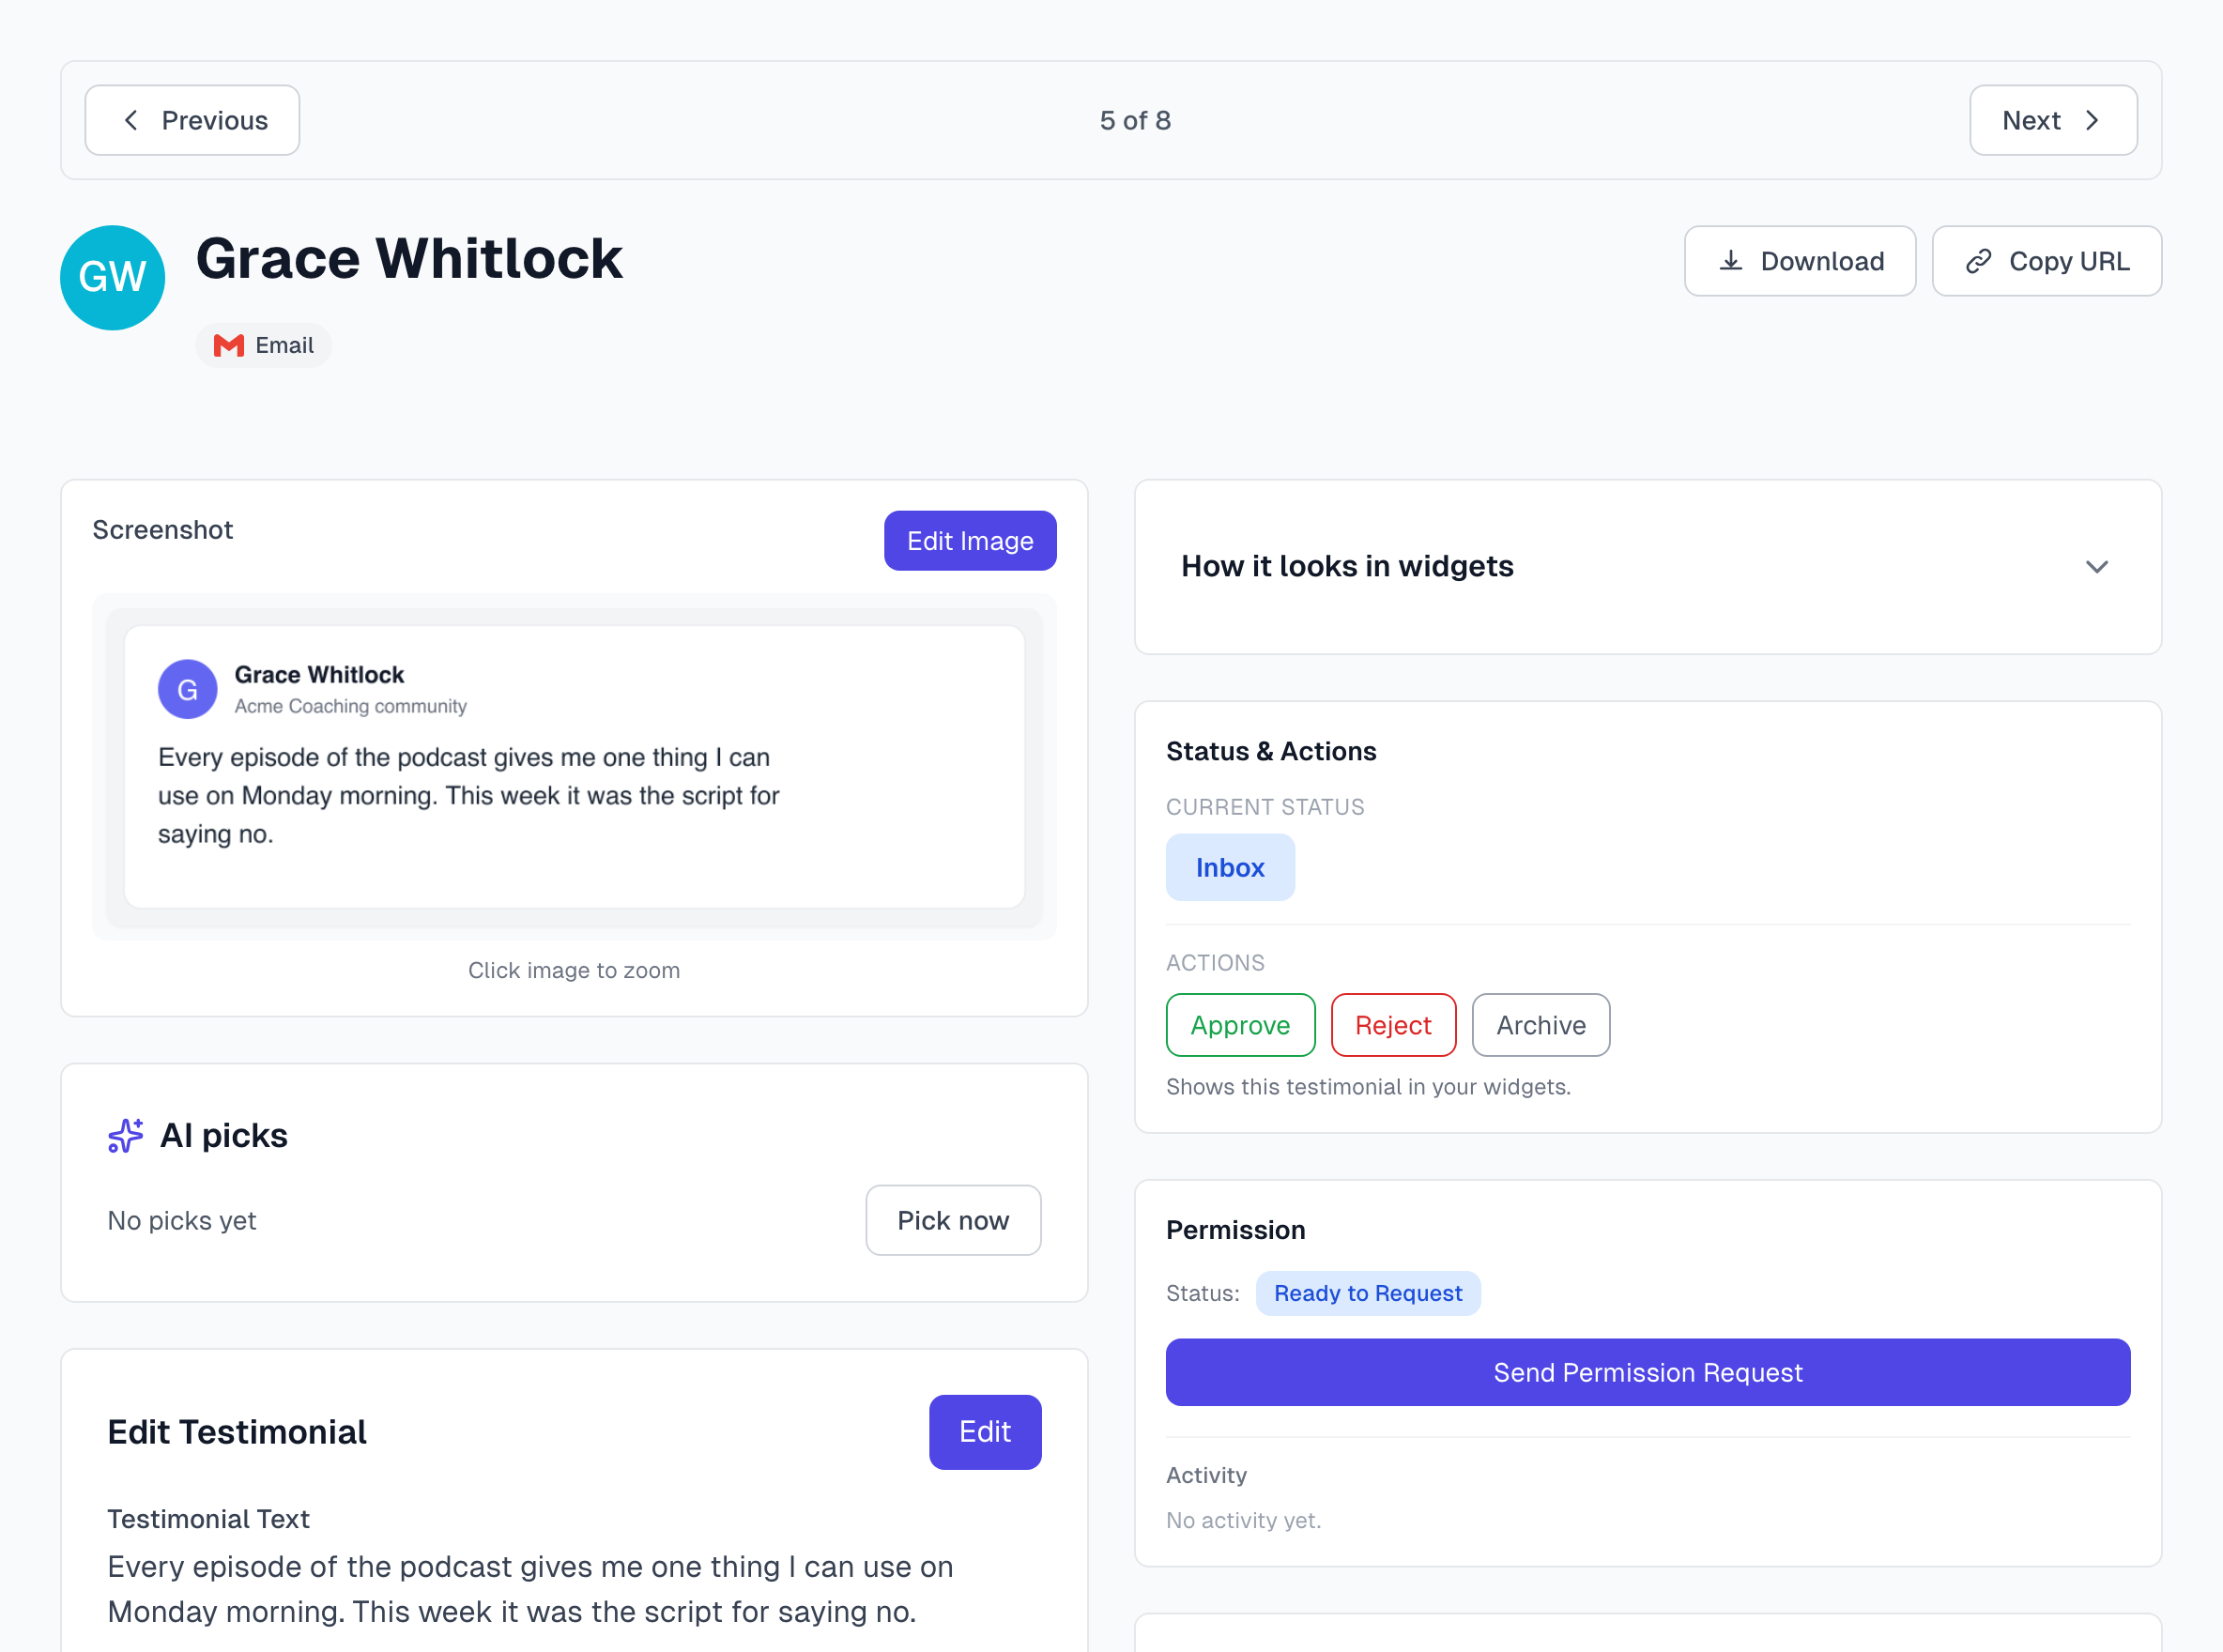
To move to the next one, use Previous and Next at the top of the page, or the left and right arrow keys.
Fix the details
Scroll to Edit Testimonial and click Edit.
Compare each field with the screenshot. Watch for misspelled names, a job title in the company field, and a rating that is not in the original.
Click Save.
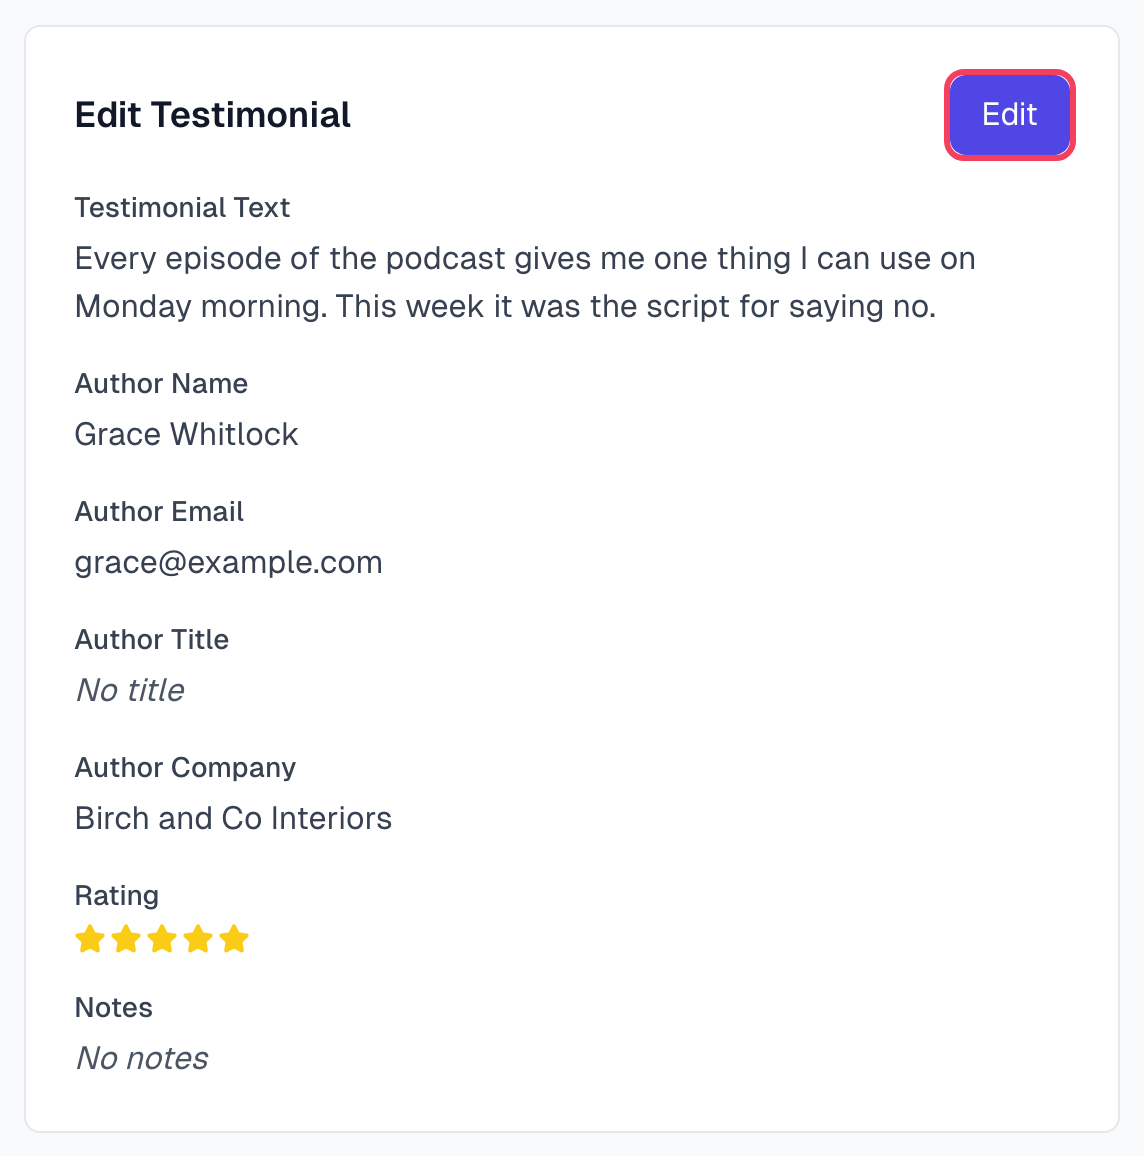
Author Email is often empty, because most screenshots do not show one. Add it here if you have it. You need it to ask for permission.
The AI picks card holds a short AI summary and a main quote. Change them if you like and click Save picks. To see the result, open How it looks in widgets.
Hide private details in the screenshot
Click Edit Image above the screenshot.
Choose a tool: Redact blacks out an area, Blur pixelates it and Stamp covers it with a color. Crop, Auto Crop and Expand change the image size.
Click Save.
The edited image replaces the screenshot. Magic Testimonials keeps the original file, and it is included in a Full Backup.
Add tags and a project
Tags help you find testimonials later. In the Tags card, type in Add tag..., or click Get Suggestions to see what AI proposes. AI may already have added some. Use the Project card to file the testimonial under a campaign or client.
Ask the author for permission
You need three things first: the Author Email, a Support Email and a mailing address. Organization settings shows where to add the last two. The Permission card tells you if one is missing.
In the Permission card, click Send Permission Request.
The author gets an email with a link to a page that shows their testimonial and three choices.
The author chooses | Permission status | Testimonial status |
|---|---|---|
Yes, use my name | Granted | Approved |
Yes, but hide my name | Granted, anonymous | Approved (Anonymous) |
No, don't use this | Declined | Archived |
If the author does not answer, the request stays waiting and the testimonial does not go live. No reminder goes out by itself, and silence never counts as a yes. To send the email again, click Resend on the Permissions page.
The Permissions page in the sidebar lists every request and its status. See Sending a permission request.
Approve without asking
If you already have permission, click Approve in the Status & Actions card. This shows the testimonial in your widgets, so ask first if you plan to publish it. The button is hidden while a request is waiting for a reply. Manual approval covers yes answers you got by email or in person.
Reject, archive or change your mind
Reject marks a testimonial you will not use.
Archive takes it out of your active list and keeps it for your records.
Move to Inbox brings a rejected or archived testimonial back.
To undo an approval, click Reject or Archive.
Status workflow explains each status.
Good habits
Clear your Inbox in one sitting once a day or once a week. It is faster than one at a time.
Send permission requests early. Replies can take days, so do not wait until you need the testimonial.
Check rows marked Duplicate. If it is a false alarm, open the testimonial and click Not a Duplicate.
If something goes wrong
All the fields are empty
AI may not have been able to read the screenshot. Click Reprocess in the Processing card, type the details in yourself, or capture it again with a tighter box.
The screenshot does not show the author's email
Add it yourself if you have it. If you have connected an email tool, click Find Email in the Permission card. See Find one author's email.
I sent the request to the wrong address, or it bounced
An Owner or Admin can click Delete next to the request on the Permissions page. The testimonial returns to your Inbox. Correct the Author Email and send the request again.
Last updated